How to make clips using kdenlive
(Feevel)
Step One
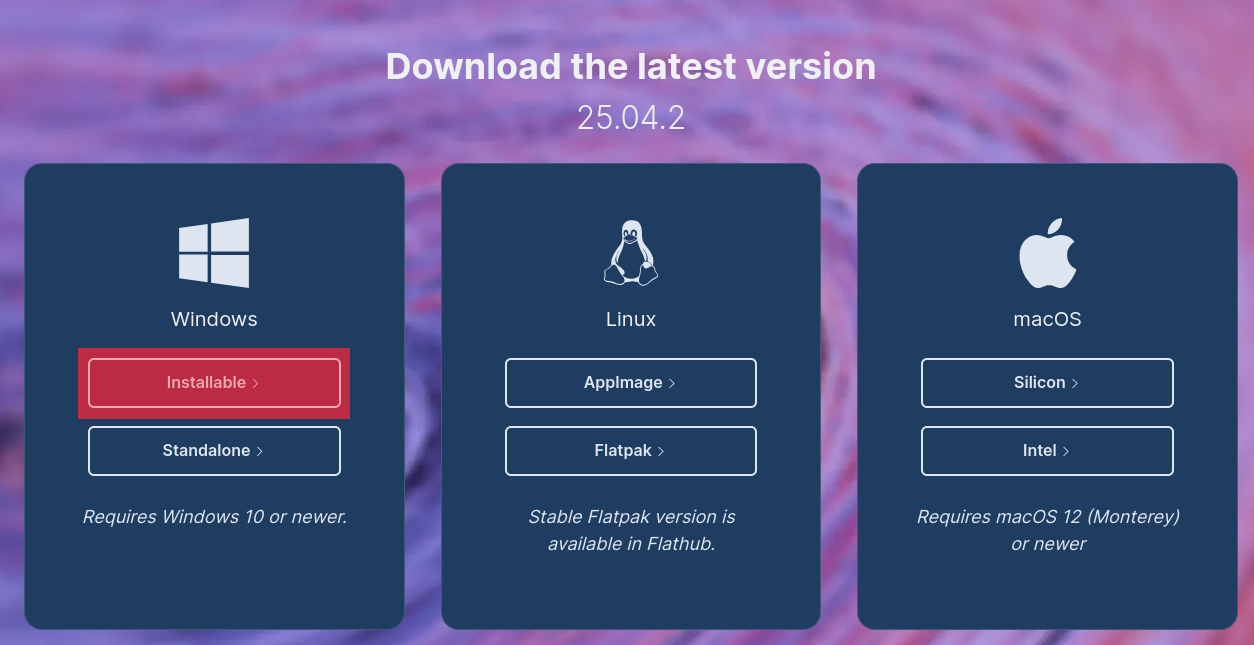
Installing kdenlive
In order to make clips using kdenlive, you'll need to first install kdenlive. Click the button below in order to download kdenlive.
Click the "Installable" button to download the installer executable file.
From there, run the file that just downloaded and follow the instructions from there.
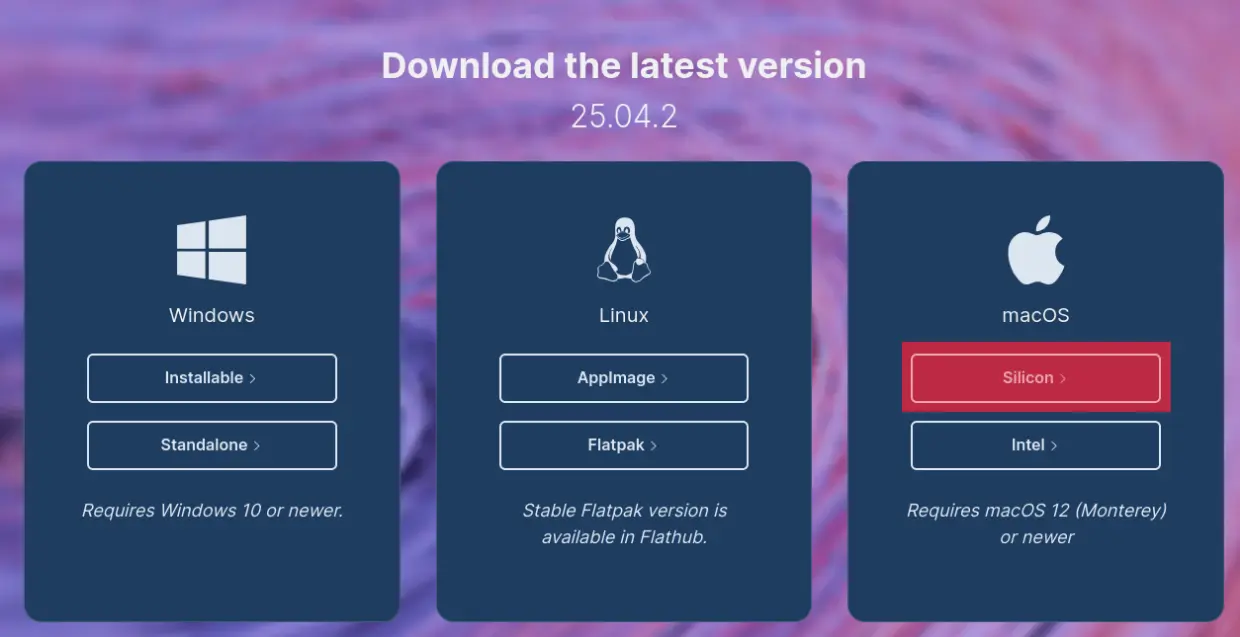
I don't typically use Apple computers, so you'll have to guess and check here. If you know what to do, go for it.
Typically, newer computers would work with the Silicon option, so select "Silicon".
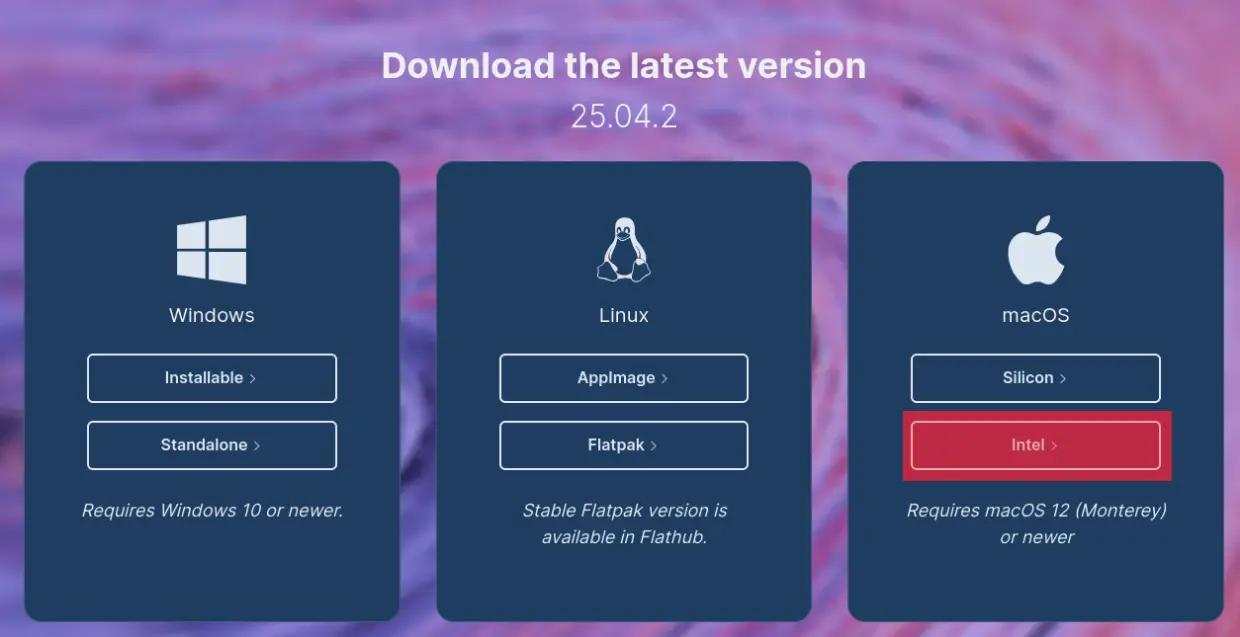
If, for some reason, it gives you an error, click the "Intel" button.
If neither of these options work, then just go use iMovie since I literally do not own an Apple computer.
You will be given a .DMG file. Once you open the file, it should look similar to this.
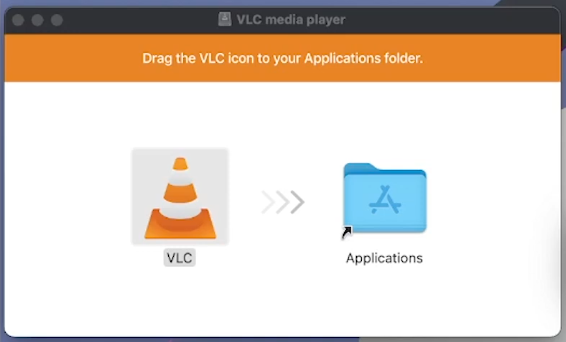
Drag and drop the kdenlive app into the Applications folder, and then wait. Once it's done, it's installed.
You use Linux. You should know.
Step Two
Adding videos to kdenlive
So now that kdenlive is installed, you can now go ahead and create your clips with it.
To start, open kdenlive. Then, it should look similar to this:
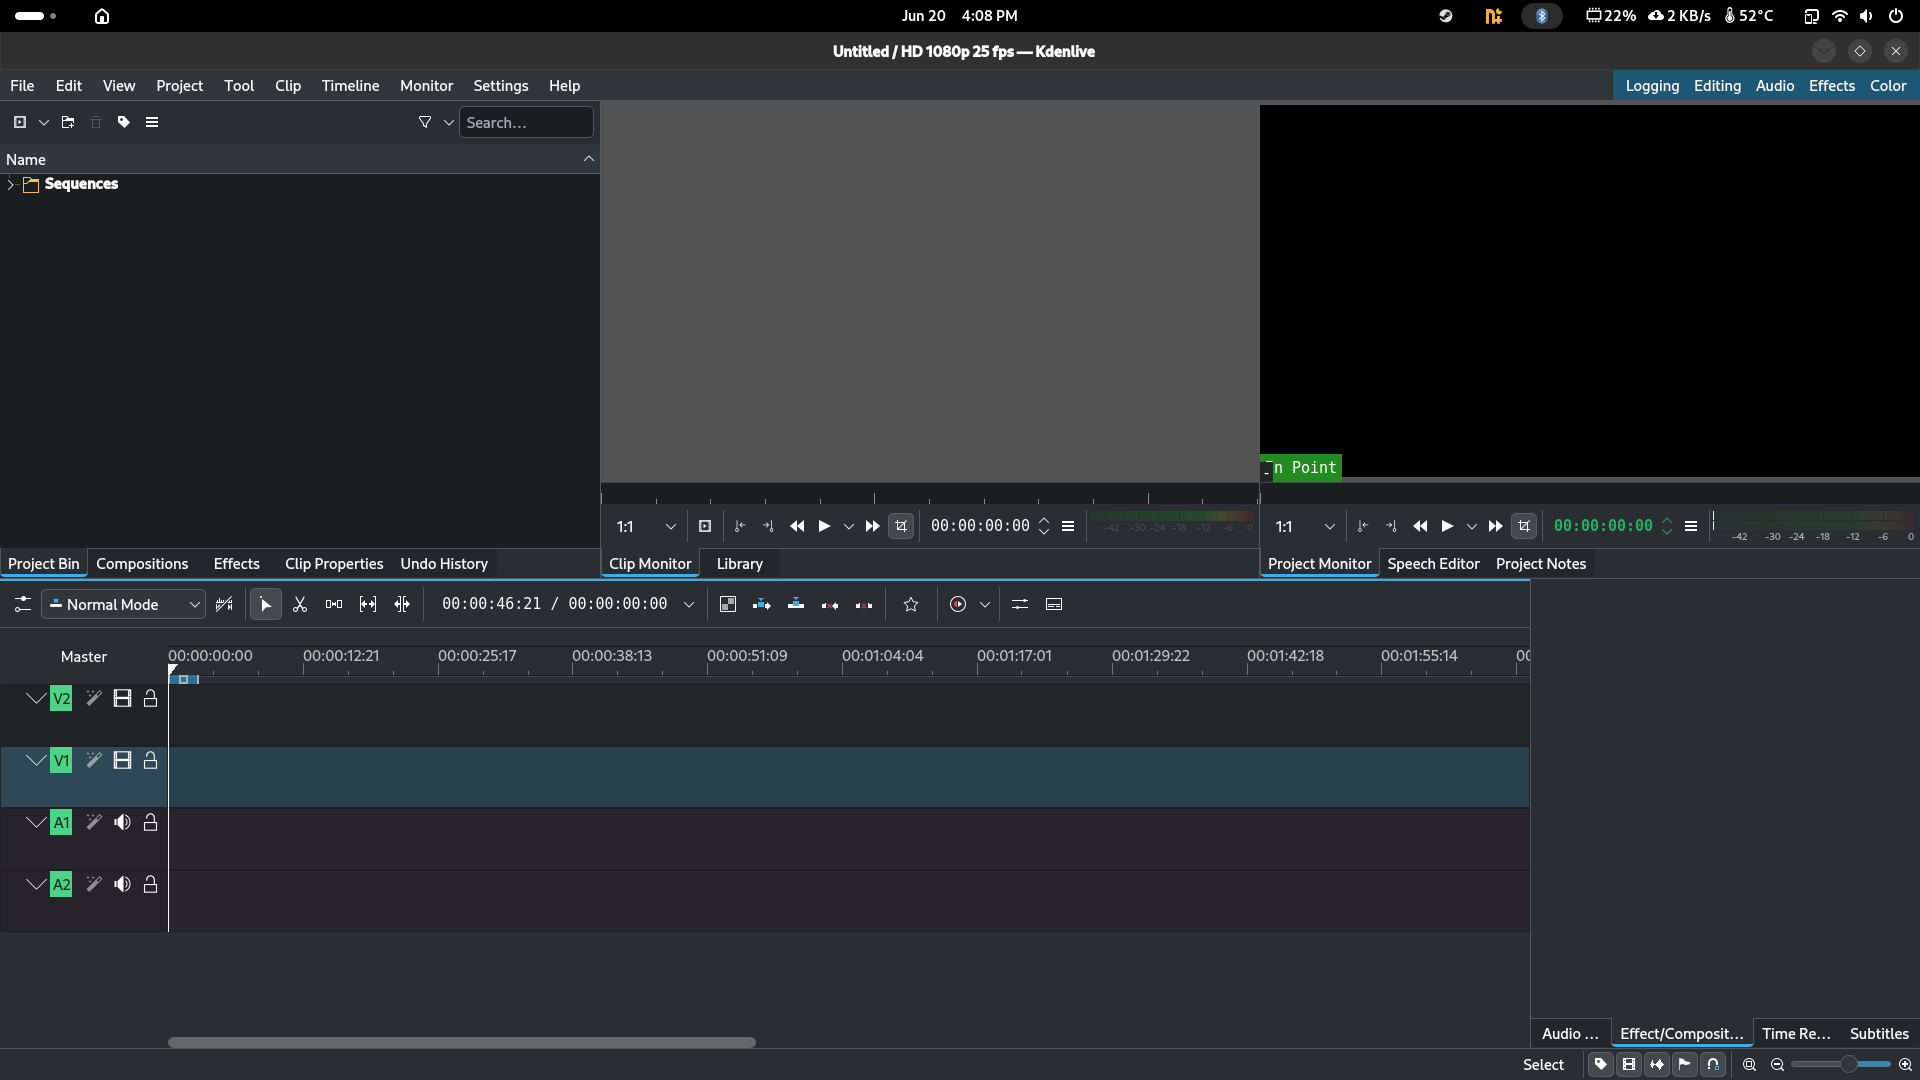
To add a video so you can edit it, click this button here:
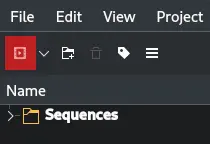
You'll then need to find and select your video. Once you've selected it, click "OK" (I'm using the Night on the Galactic Railroad movie as an example"

If you get a message asking you to switch profiles, click "Switch"

Step Three
Clipping videos in kdenlive
Drag and drop your video onto your timeline
You'll now need to find the scene that you want to show. In order to zoom in and out, you can either
- Hold Control (CTRL) and scroll with your mouse, or
- Hold Control (CTRL) and press either the - or + button (- for zoom out, + for zoom in)
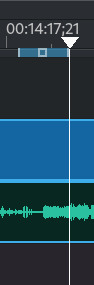
Once you have found the scene you want, tap the <- arrow until you reach the beginning of that scene. You'll notice the frames in the top-right box change as you press the keys. Make sure you're on the frame of the scene you wish to clip. Then, click the "Set Zone In" button
A little white box would appear above your clip. Next, you'll need to select the end of your scene. To do that, click the "Set Zone Out" button. Again, make sure that your clip is contained within the scene, and not a single frame over into the next scene that you want cut out.
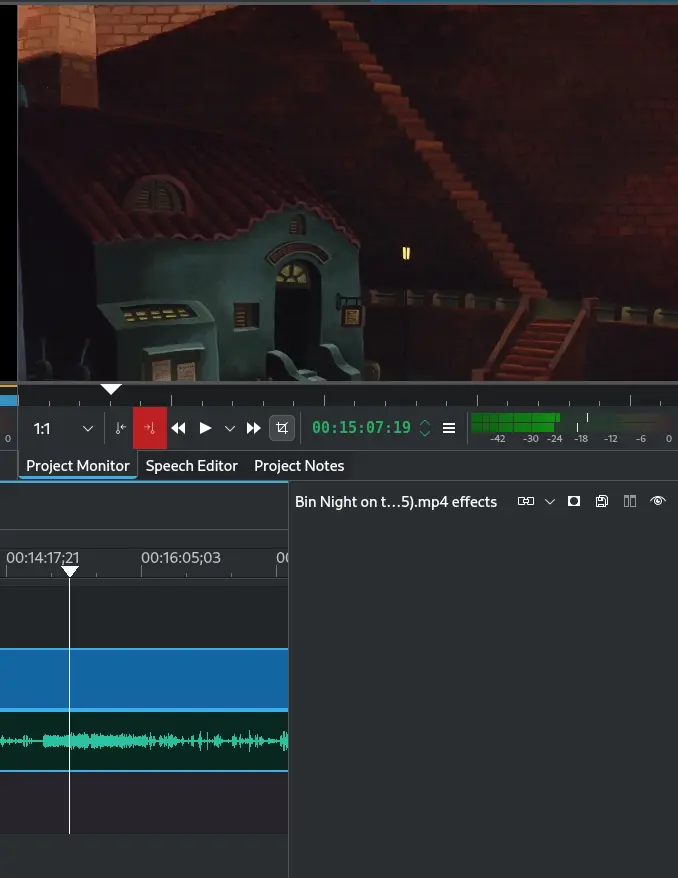
Your clip has now been selected.
Step Four
Rendering in kdenlive
Your last task is to render the video. This is the process of turning the clip into its own video file.
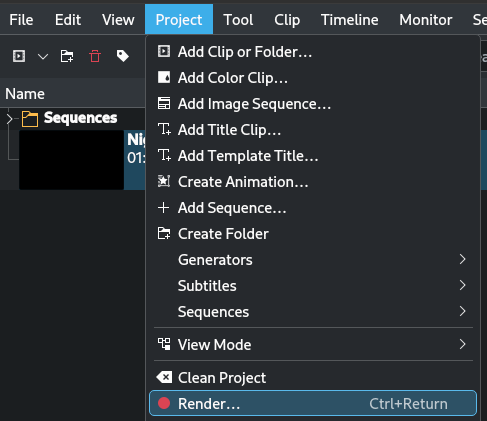
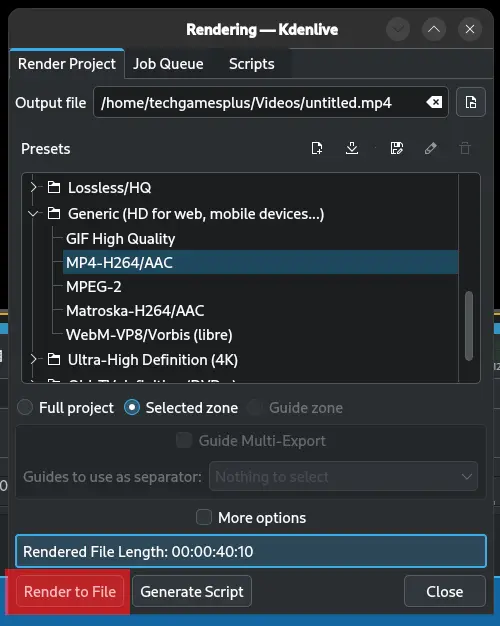
To do that, go to the top-left corner, select "Project", followed by "Render..."
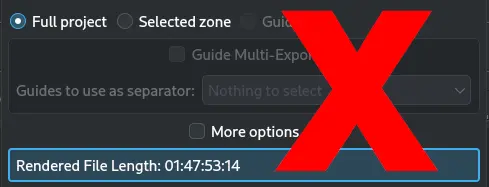
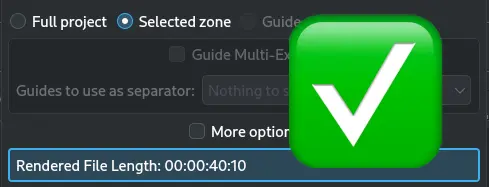
Make sure you click "Selected zone". This ensures that kdenlive only creates a video with what you selected. If you render the video when it has "Full project" selected, it will essentially copy the entire film, and you do not want that.
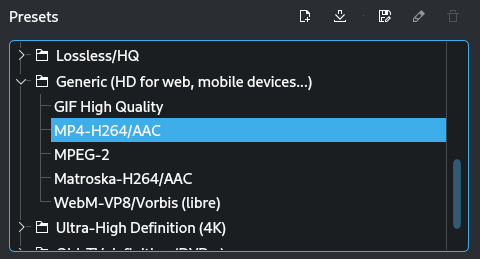
For presets, make sure you select Generic -> MP4
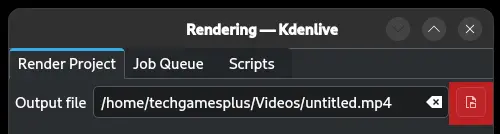
Now, you'll need to select a location where you want to put the new clip. Click the highlighted button to select a location. (You're creating a new file. This is the exact same process of saving a new file. Give it a name and make sure it ends with ".mp4")
Finally, you can then click "Render to File"
Once the video has been created, you can now do whatever you like with it :)

The End